Student portal — user manual

How to use every screen of the Raisd Student portal: where to find it, what it shows, what you can do, and the rules that apply. Written for students and for reviewers trying the Demo.

Demo — sample data, changes reset Open the Demo portal Quick use guides Screenshots Capabilities
This is a Demo. Every student, invoice, message and result is synthetic. Nothing you do is sent to the campus CMS, Finance, EMGS or Immigration, and most changes disappear when you refresh the page. Buttons described below as “not active yet” are shown for review but do nothing in this phase.

1. Getting started

Open the portal, understand who you are signed in as, and read the header.

Open the portal and sign in

  1. Go to raisd-student-portal.vercel.app in a current browser (Chrome, Edge, Safari or Firefox) on a computer, tablet or phone.
  2. There is no login screen or password in the Demo. The portal signs you in automatically as a Demo student and opens the Dashboard.
  3. The hosted Demo signs in as Alya Putri (10029841), a first-semester Local student in Registration Week. Each page load signs in again.

Demo students

The portal ships four Demo scenarios (all Cyberjaya campus). The hosted Demo uses the first one; the others are used by implementers.

ScenarioStudentSituation
Registration WeekAlya Putri · 10029841New Semester 1 Local student about to register modules. No results, invoices or messages yet; no Immigration menu.
New Student PassMei Lin · 10029862Enrolled international student preparing a Student Pass application.
Mid-programmeRizal Hakim · 10023456International student, three semesters done, Semester 4 in progress, six existing conversations.
Graduation readyNadia Pratama · 10021015International student with a completed study plan (120 credits, CGPA 3.00) and cleared fees; Graduation Clearance is due.
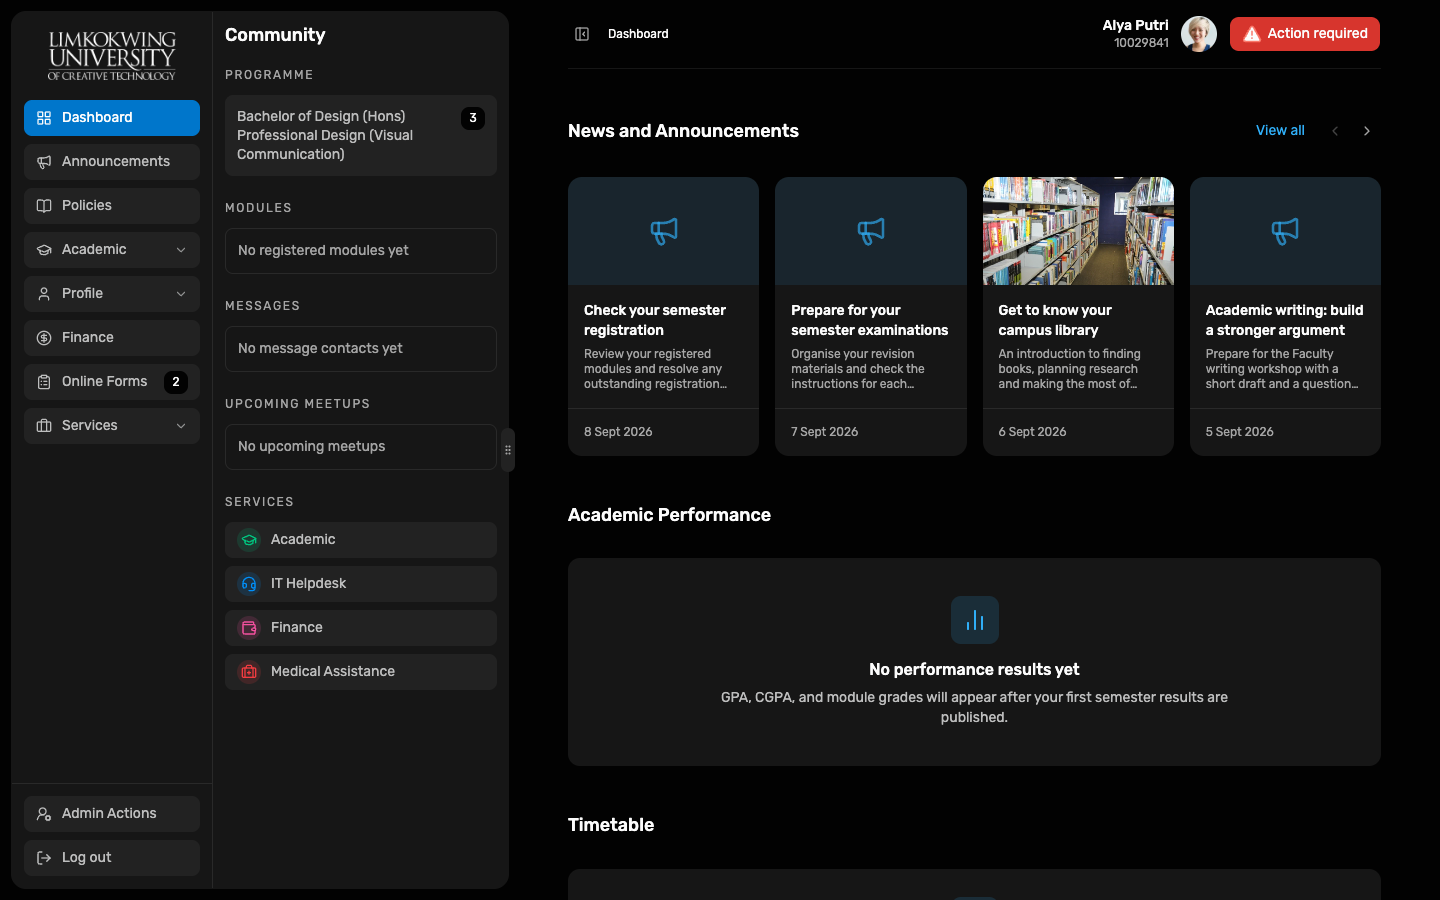
Student portal Dashboard

2. Finding your way

The sidebar on the left, the Community panel on the right, and how both adapt to your screen.

Community panel

  • Programme — your programme group chat.
  • Modules — one group chat per registered module (“No registered modules yet” until you register).
  • Messages — your one-to-one conversations (“No message contacts yet” until you send a first message).
  • Upcoming Meetups.
  • Services — Academic, IT Helpdesk, Immigration (international only), Finance and Medical Assistance.

Unread badges show on group rows. Select a row to open its chat and Back to go up a level. See Chats and IT Helpdesk for sending messages.

Phone, tablet and computer

ScreenNavigationCommunity
Phone (under 768 px)Burger icon opens a full-width drawer; it closes after you pick a page. Swipe left to dismiss.Full-screen overlay; swipe left to dismiss.
Tablet (768–1199 px)Icon rail with tooltips; Academic, Profile and Services open side menus.Full-screen overlay.
Computer (1200 px and wider)Full sidebar, can be hidden.Docked on the right; drag or use the arrow keys to resize.

Chat drafts, attachments and scroll position survive a layout change. Everything works with the keyboard, focus is always visible, reduced-motion and high-contrast settings are respected, and content stays usable at 200% text size. Pinch-zoom is disabled on phones — a known limitation.

3. Dashboard, calendar, announcements and policies

Your home screen and campus information.

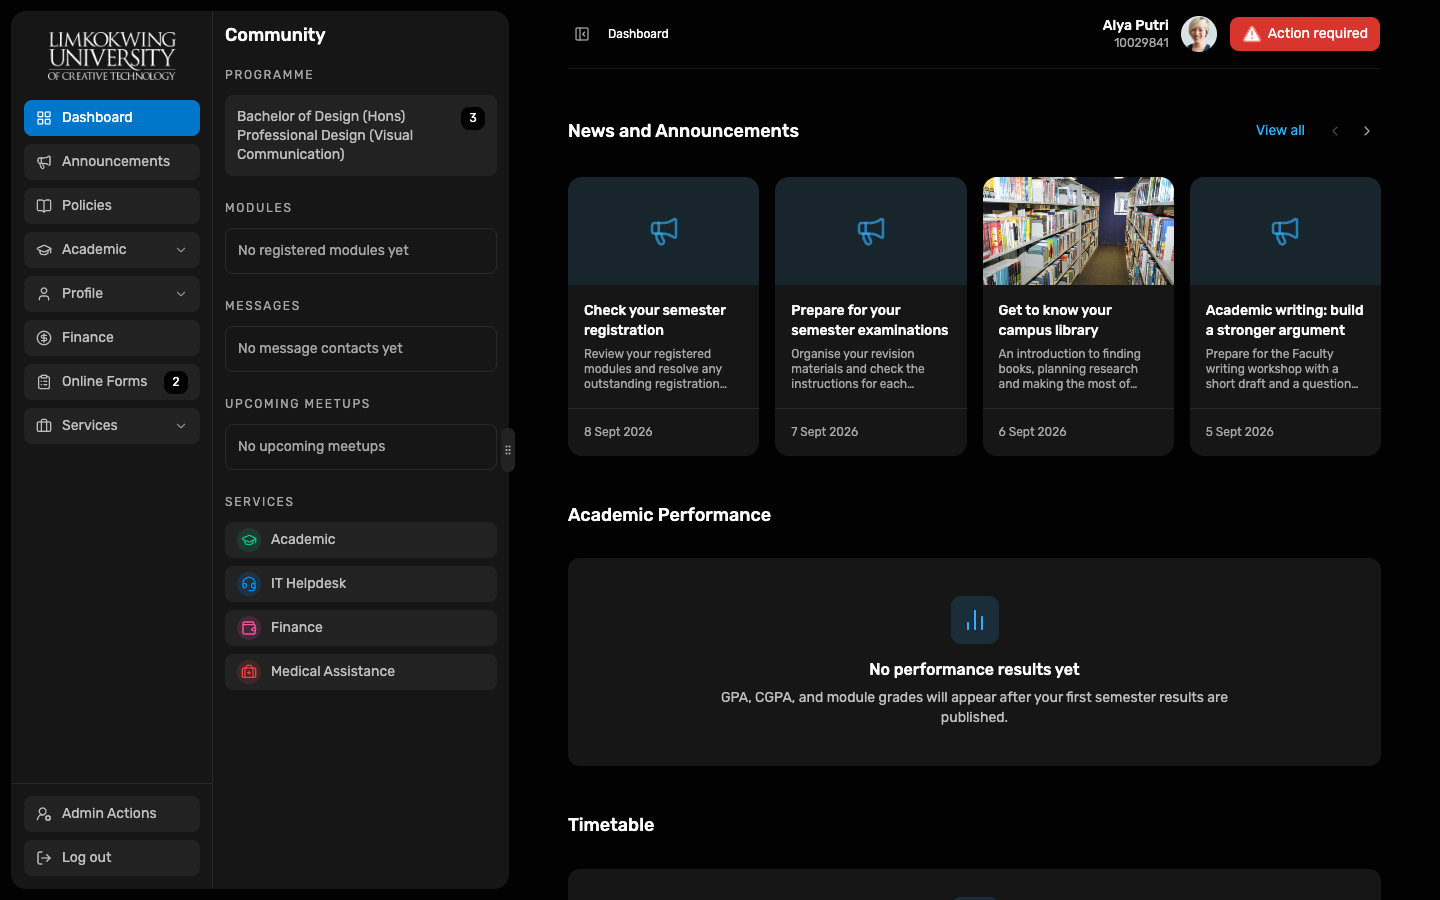
Dashboard

Sidebar Dashboard or the university logo · /

  • News and Announcements — carousel, newest first. Select a card to read it or View all for the full list.
  • Academic Performance — your GPA and CGPA charts.
  • Timetable — select a class to open its module. During registration it links to Module Registration.
  • Calendar — see below.
  • Modules — your registered module cards.

If you have no current semester, Calendar and Modules are replaced by a message: Study plan complete (with Open Graduation), Enrolment deferred or Enrolment withdrawn (with Contact Academic Support), or No current study period.

Dashboard

Calendar

On the Dashboard — there is no separate calendar page.

  1. Use the arrows to change month. The calendar opens on today (or on the month registration opens). Days outside your registration-to-semester-end period are muted.
  2. Coloured dots mark events: Class, Assignment, Exam, Meetup, Holiday, Registration. More than three show “+n”.
  3. Select a day to list its events below the grid (12-hour times, for example 12:00 pm–1:00 pm).
  4. Select a class to open Module Details, or an assignment/exam to open it in Materials. Registration, meetup and holiday cards are information only.

Cancelled classes are removed and make-up classes added. Assignments and exams appear only once released. You cannot add or edit events.

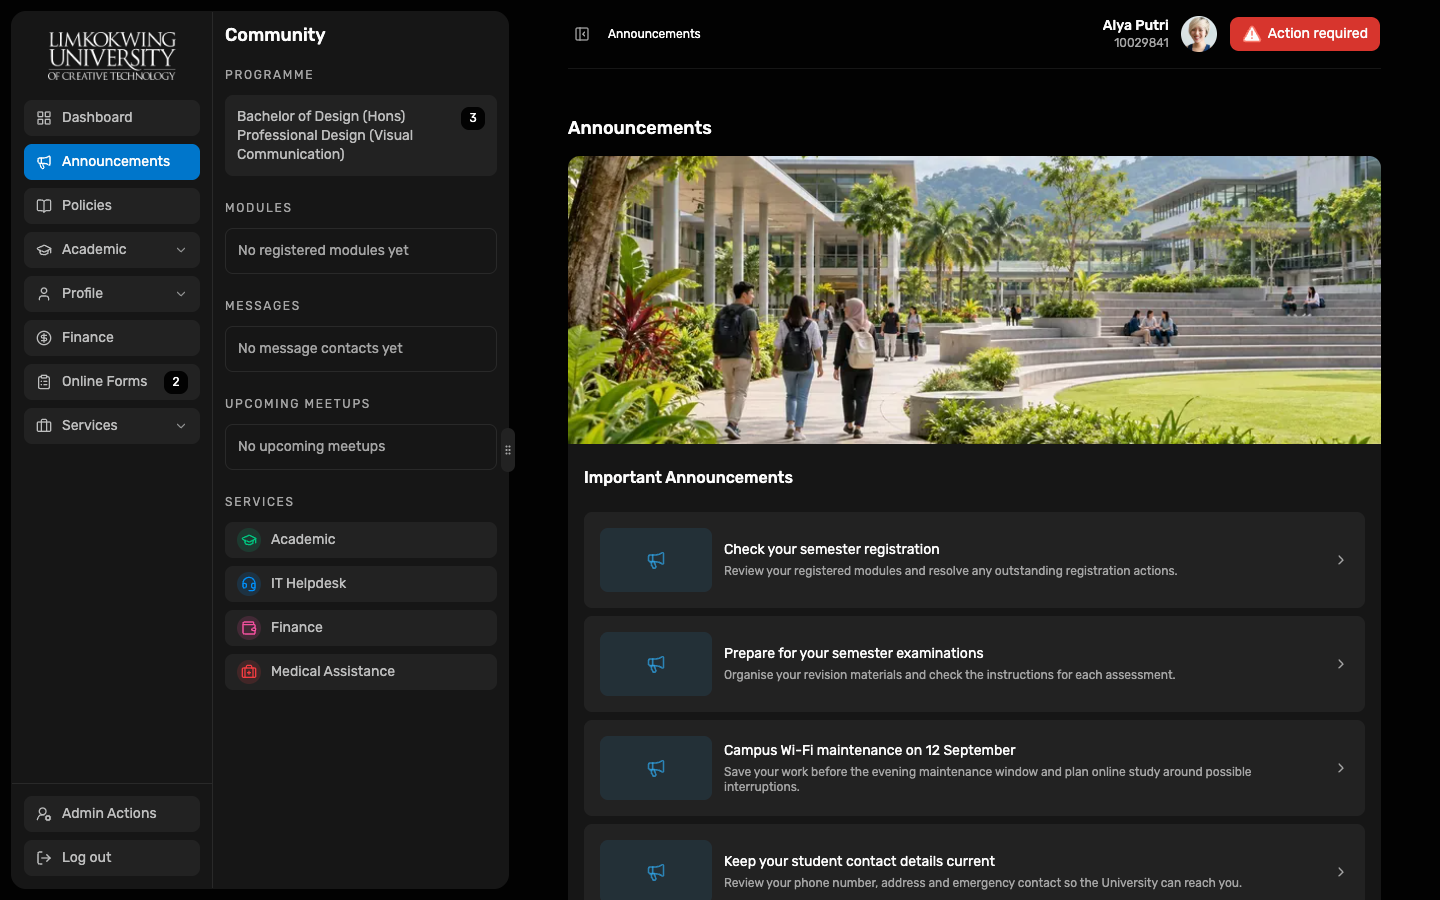
Announcements

Sidebar Announcements · /announcements

  1. Important Announcements (pinned) appear first, then All Announcements.
  2. Select a row (or press Enter/Space) to read the full article with its images and tables.
  3. Use the breadcrumb Announcements › Announcement Details to return.

No search, filters, read markers or notifications yet. The ten articles are sample content, not real campus notices.

Announcements

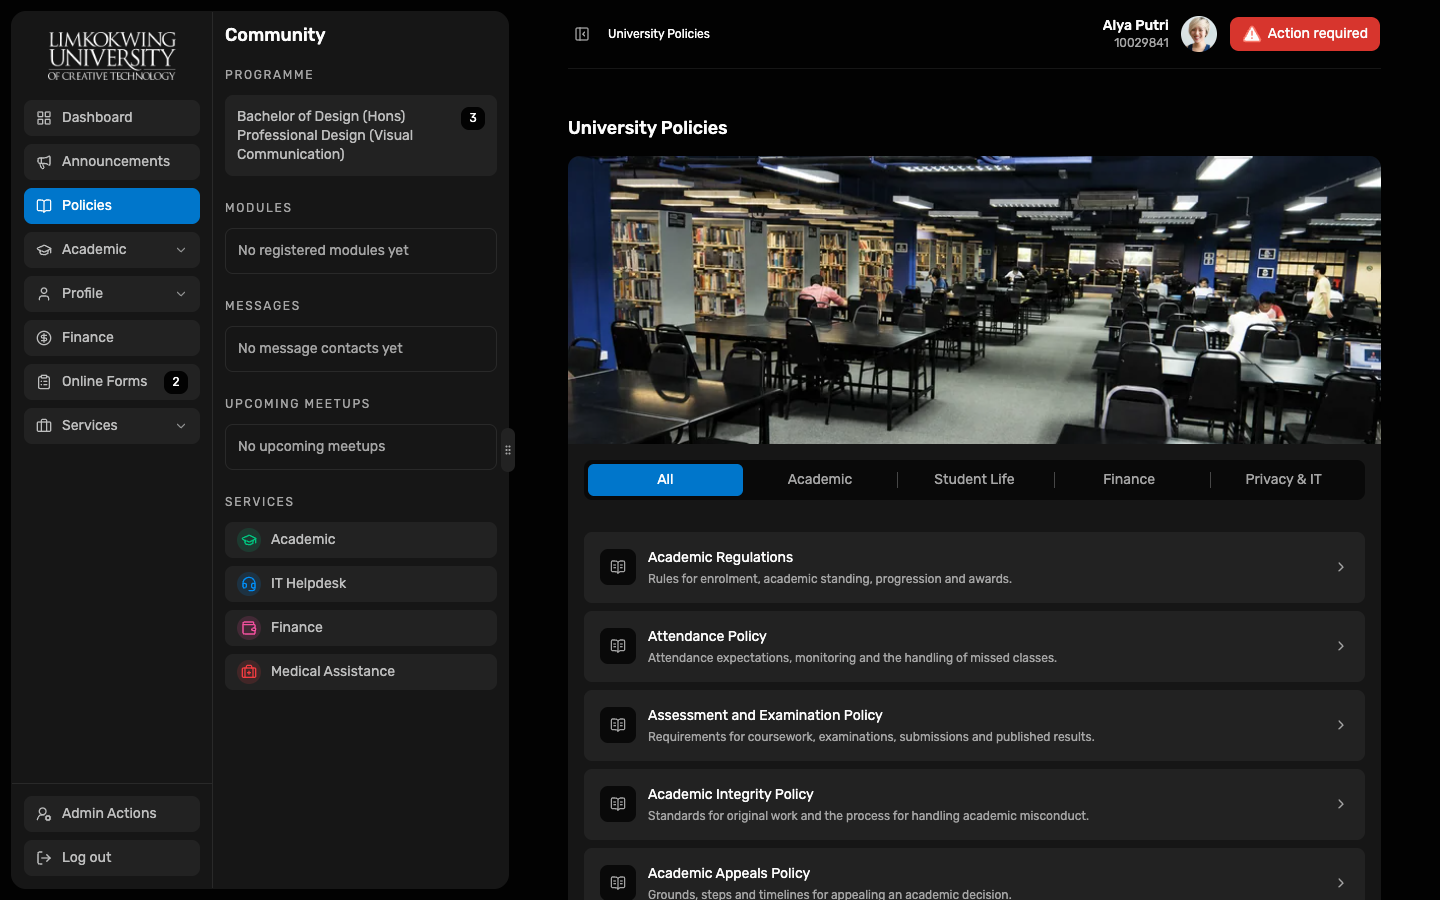
University Policies

Sidebar Policies · /policies

  1. Filter by All, Academic, Student Life, Finance or Privacy & IT. The filter stays in the address, so Back and Forward keep it.
  2. Browse the 14 policies (for example Academic Regulations, Attendance Policy, Student Handbook, Student Fees and Refunds Policy).

Opening a policy is not active yet — there are no full texts or downloads. Titles and summaries still need campus approval. If loading fails, choose Try again.

University Policies

4. Academic

Your modules, schedule, attendance, results, study plan, registration and graduation.

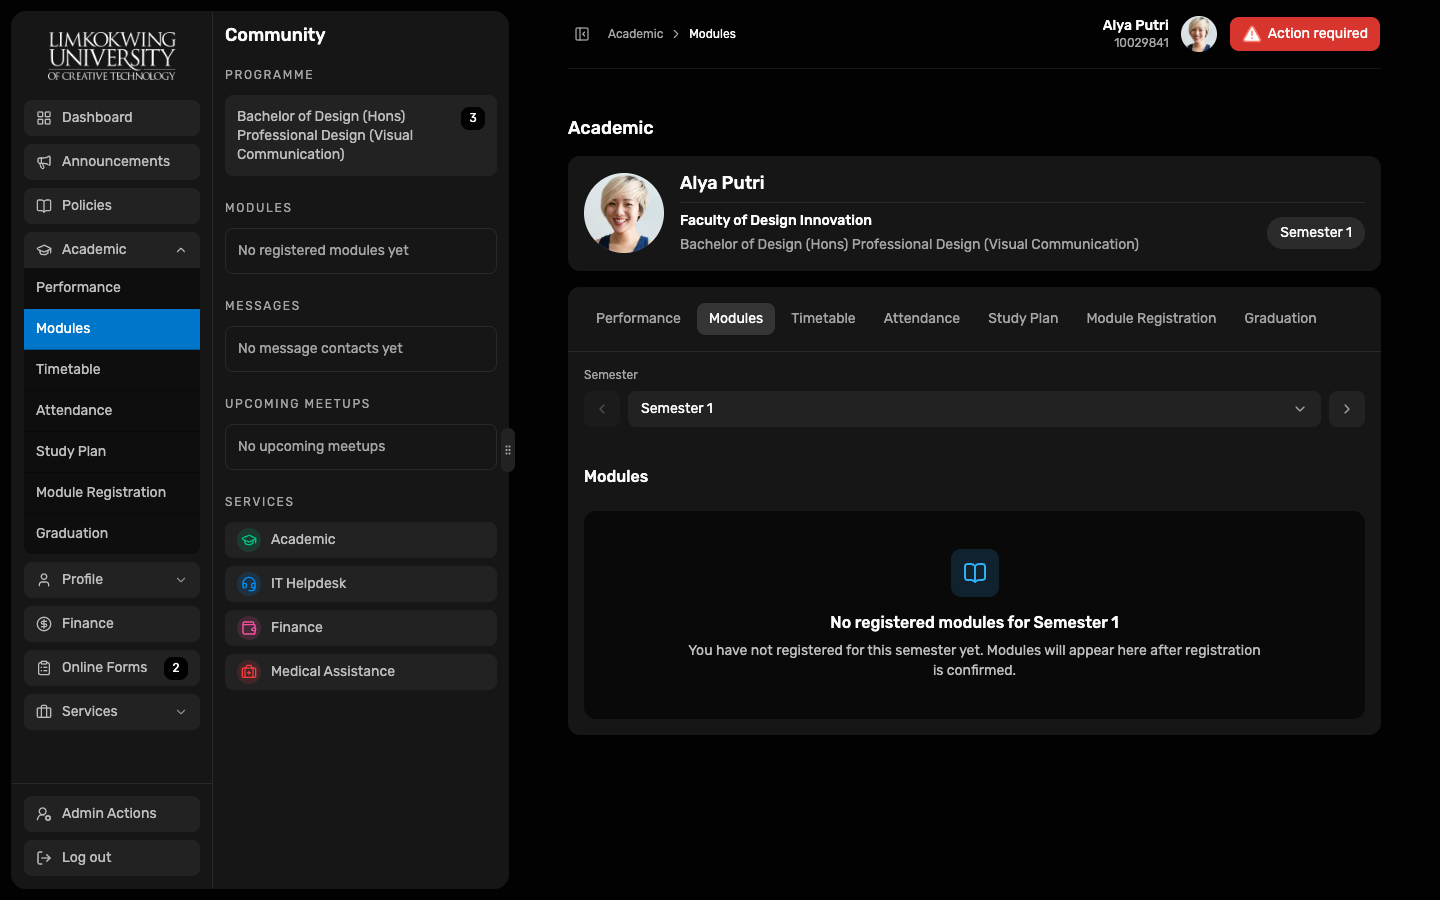
Modules and module details

Sidebar Academic › Modules · /academic/modules

  1. Pick a Semester (1–6) with the selector or arrows. Future semesters stay empty until you register.
  2. Select a module card to open Module Details with three tabs: Summary, Materials and Attendance.
  3. Summary — lecturers, the weighted assessment outline (for example Quiz 1 5%, Final Exam 35%), and credits, hours, mode and schedule.
  4. Materials — teaching weeks marked Completed, Current or Locked. A warning icon means an assessment that week needs you. Dates read Due by, Submitted on or Scheduled on.

Submit an assignment

  1. Open Materials, open the week, select the assignment.
  2. Under Your submission choose Select file, then Submit assignment.
  3. To replace it: Change submission → Update submission. To remove it: Delete submission and confirm.

One PDF or ZIP, up to 50 MiB, between release and due time. At the due time controls lock and show Submission closed. Notes, readings, videos and brief downloads do not open anything yet.

Review a lecturer

  1. Choose Review on a lecturer card.
  2. Answer all 15 ratings (1 Poor – 5 Excellent); written feedback is optional (up to 2,000 characters).
  3. Confirm. Answers cannot be changed afterwards; the button becomes View Review.

New reviews are only for registered modules in your current semester.

Demo · submissions and reviews reset on refresh; no files are uploaded
Modules

Timetable

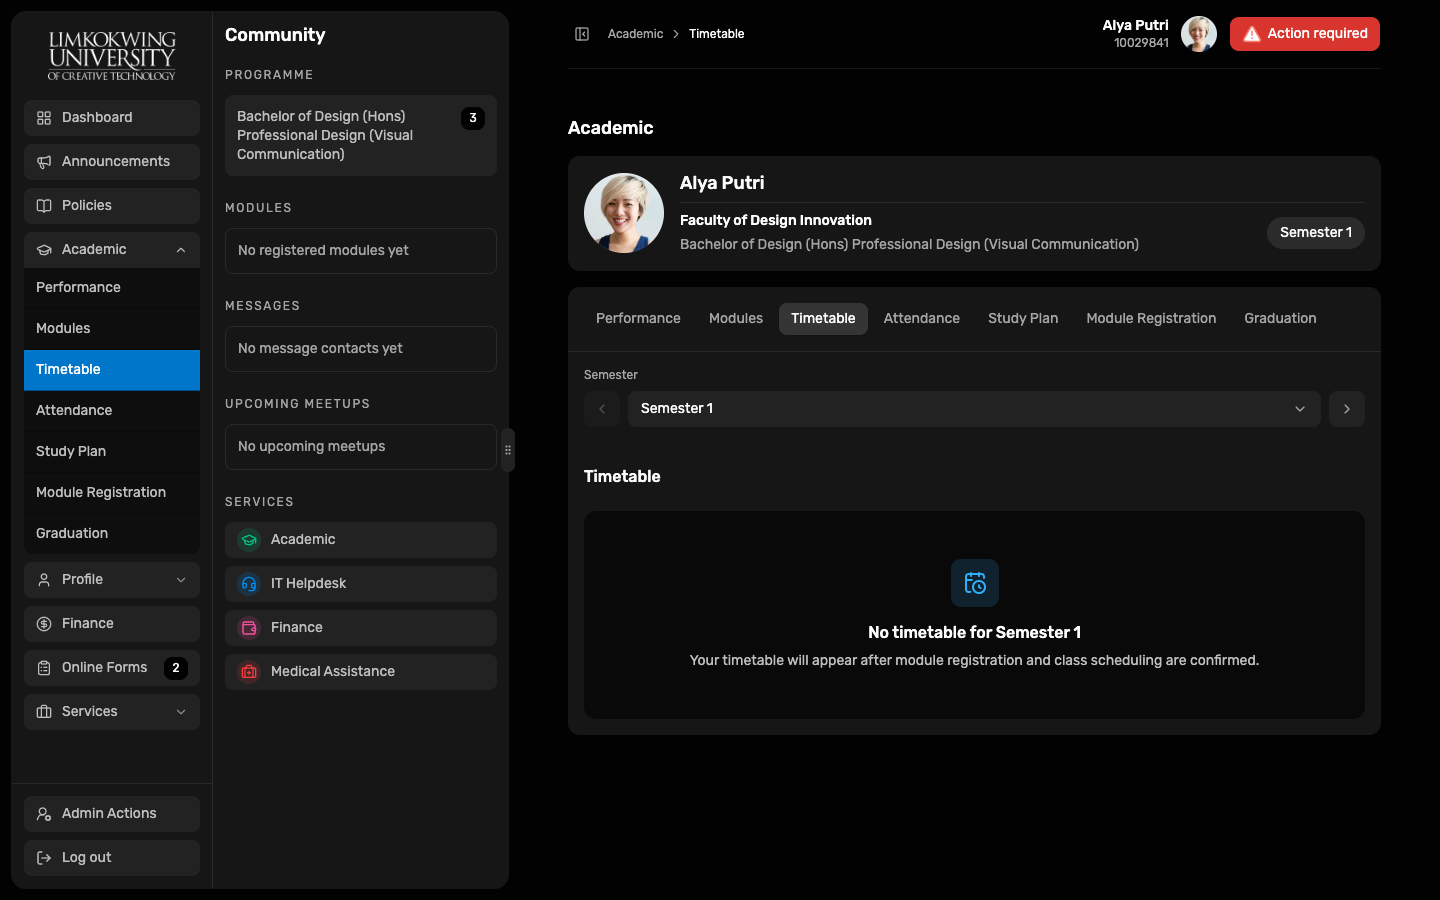
Sidebar Academic › Timetable · /academic/timetable

  • The current semester opens by default; switch to see past semesters.
  • Computer and tablet: a weekly grid from 07:00 to 19:00. Phone: weekday tabs with a day agenda.
  • A laptop icon marks online classes. The class happening now is highlighted (campus time).
  • Select a class to open its Module Details.

Only registered classes appear; a newly confirmed registration shows immediately.

Demo · read-only
Timetable

Attendance

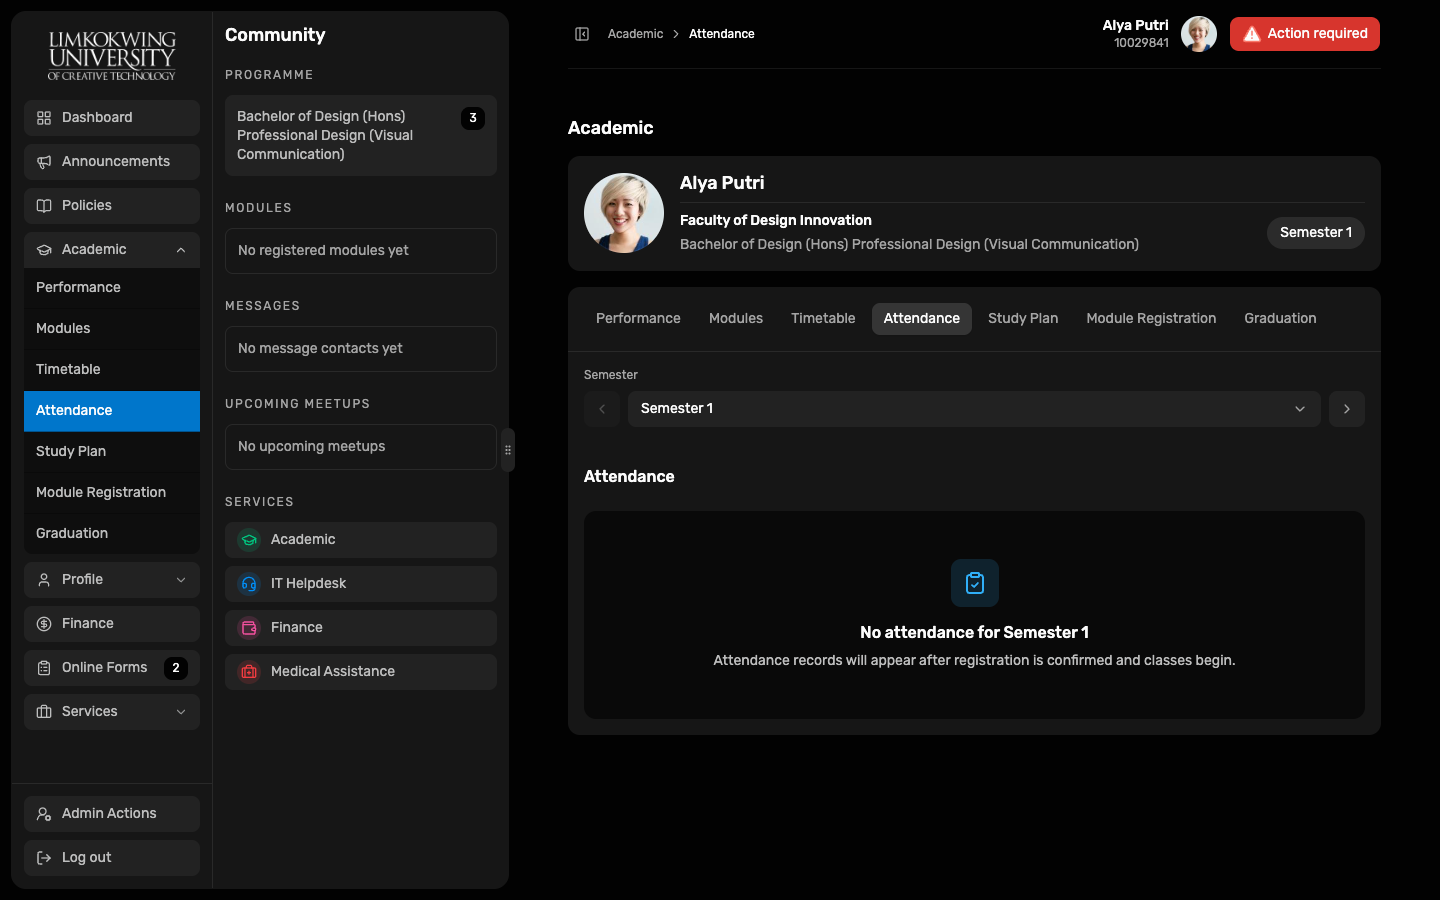
Sidebar Academic › Attendance · /academic/attendance

  • The Attendance Rate card is green at or above the minimum (currently 80%) and red below it.
  • The month calendar shows each class as Present (green), Absent (red) or Not taken (grey, future).
  • Select a date to list that day’s classes; select a class to open its module.
  • For one module, open Module Details › Attendance.

Rate = Present ÷ (Present + Absent). With nothing recorded it shows “—”. There are no late/excused statuses or appeals.

Demo · read-only
Attendance

Performance (results)

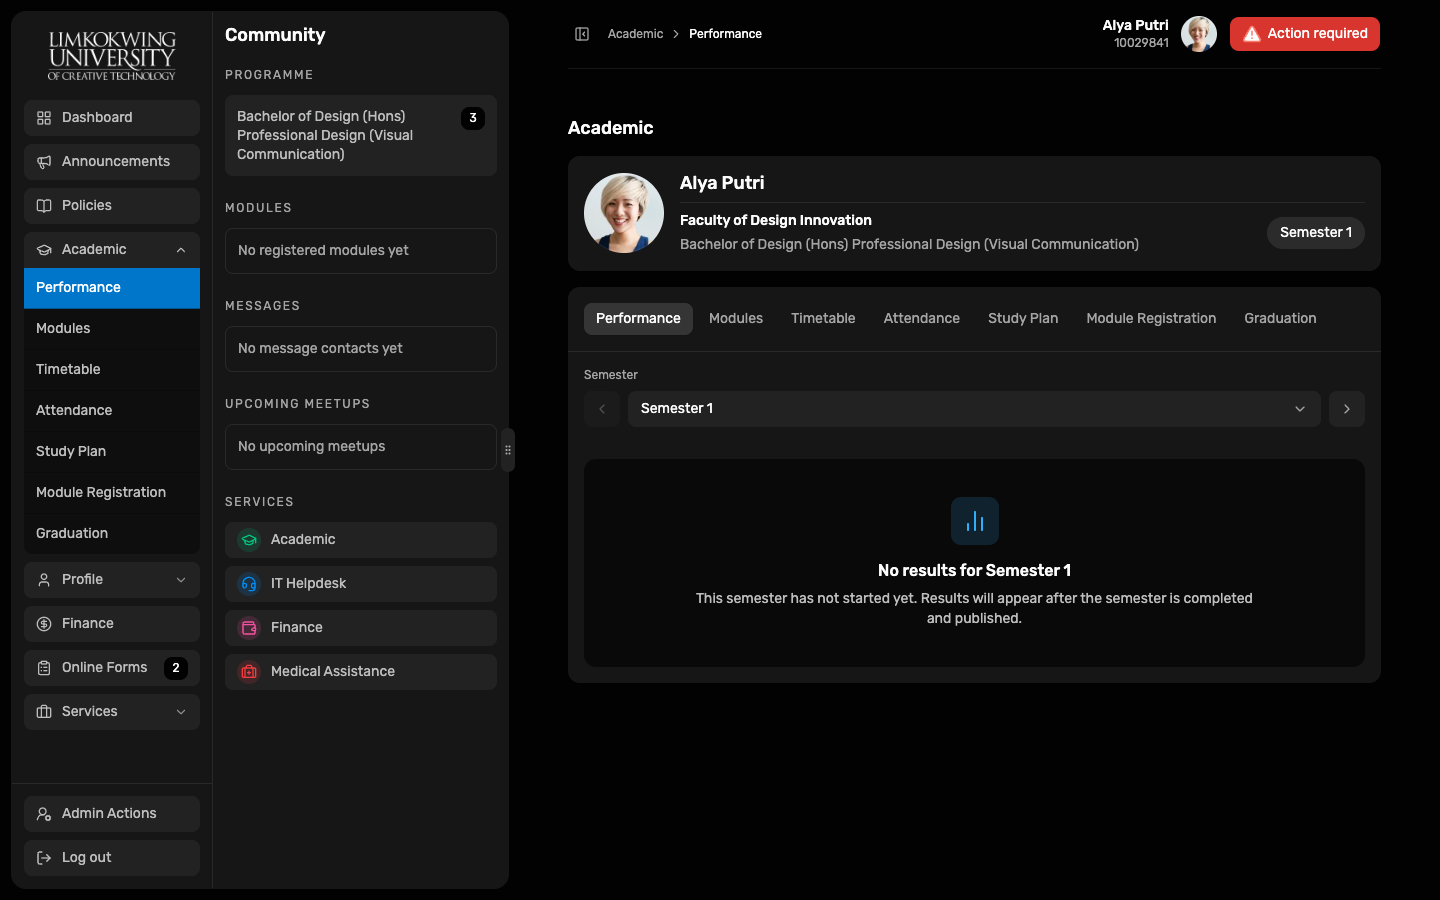
Sidebar Academic › Performance · /academic/performance

  1. Pick a semester (it opens on your latest published one) or select a point on the CGPA / GPA charts.
  2. Choose View breakdown to see how GPA or CGPA was calculated.
  3. Expand a row in Grades to see each assessment’s weight, score and contribution.

Only results published by the institution appear. There is no editing, appeal or transcript download here.

Demo · read-only
Performance

Study Plan

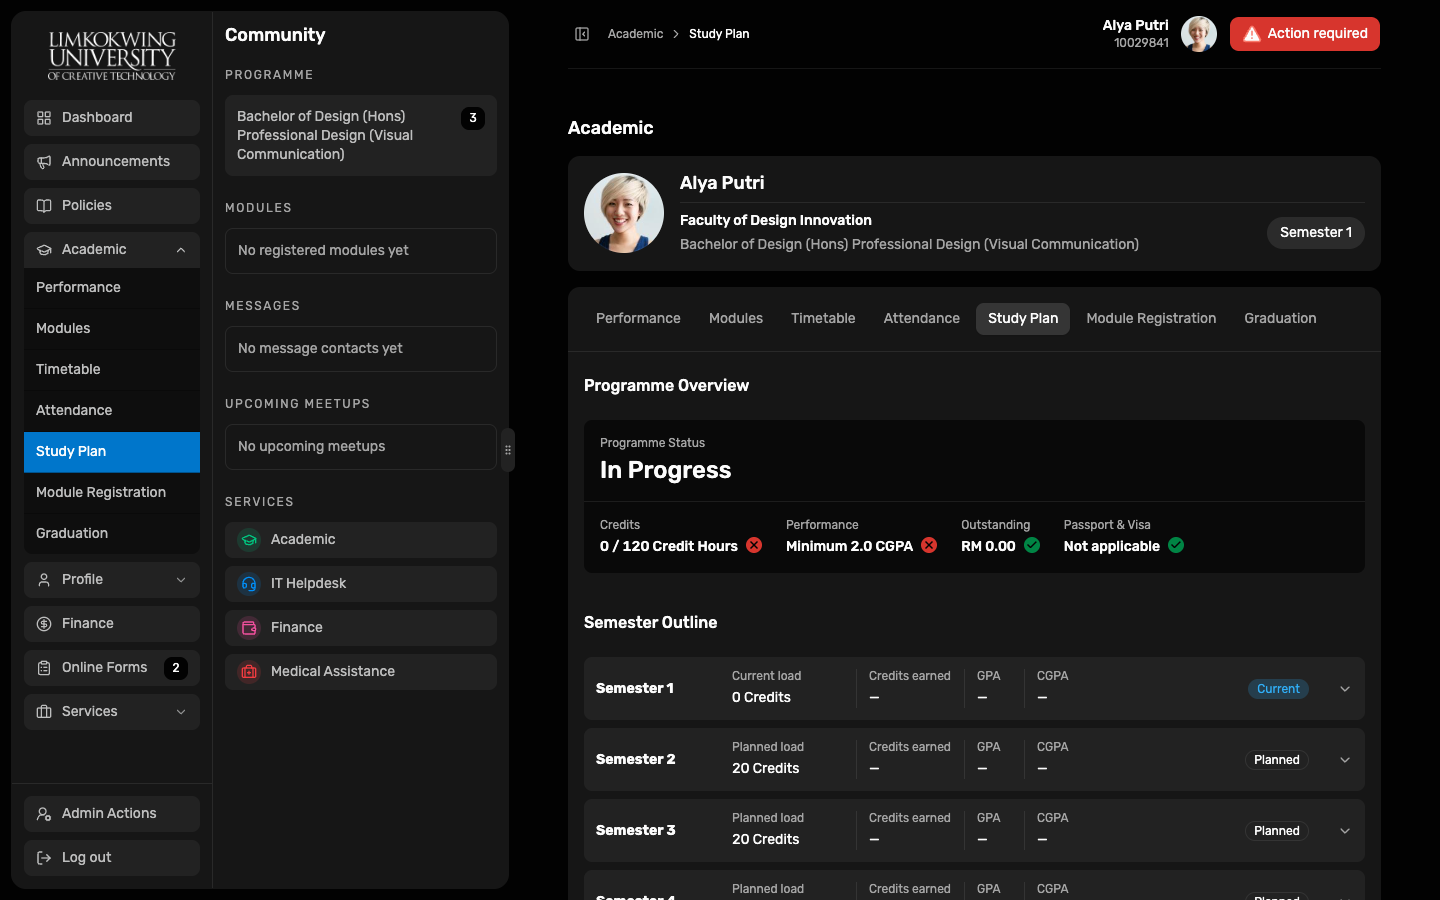
Sidebar Academic › Study Plan · /academic/study-plan

  • Programme Overview shows In Progress or Eligible for Graduation and four checks: Credits (for example 60 / 120), Performance (CGPA ≥ 2.0), Outstanding (fees must be zero) and Passport & Visa (international students; Malaysians see Not applicable).
  • Semester Outline lists all six semesters; expand one to see its modules, credits, grades, prerequisites and repeats.
  • When all four checks pass, Open Graduation appears.

A payment Finance has received but not yet applied does not clear Outstanding.

Demo · read-only
Study Plan

Module Registration

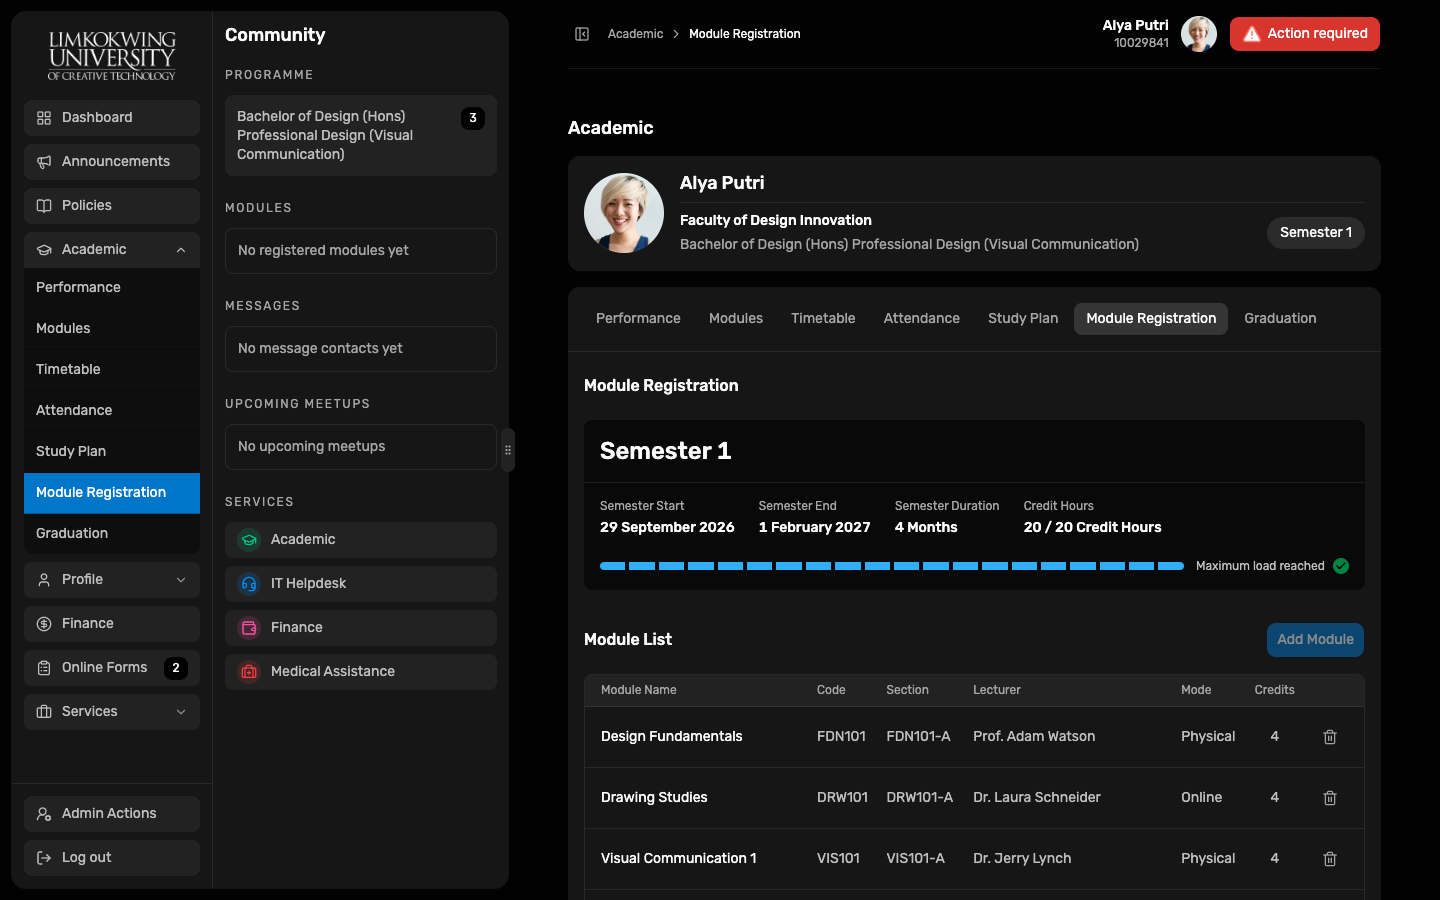
Sidebar Academic › Module Registration · /academic/module-registration

  1. Review the pre-selected recommended modules. Required repeats come first, marked (Required Repeat).
  2. To add: Add Module → choose the module and class section → Add Module. To change a row, select it and Save Changes. To remove, use the trash icon. Reset Changes starts over.
  3. Watch the credit bar and the timetable preview for clashes.
  4. Choose Confirm Registration, check the modules and fee preview (tuition, registration fee, award credit, Service Tax, Amount Due), then Confirm Registration again.
  5. You see Registration completed and a View Study Plan link.
  • 12–20 credits unless you have an approved exception; no overlapping classes; every eligible required repeat included; modules with unmet prerequisites cannot be chosen.
  • Confirmation is final — invoices are created immediately and the registration cannot be edited.
  • International students without a current Student Pass can plan but cannot preview fees or confirm until their new-pass application reaches eVAL approval.
  • Before registration opens you see “Opens [date]”; if it closes without confirmation, Registration missed.
Demo · registrations and invoices reset on refresh
Module Registration

Graduation

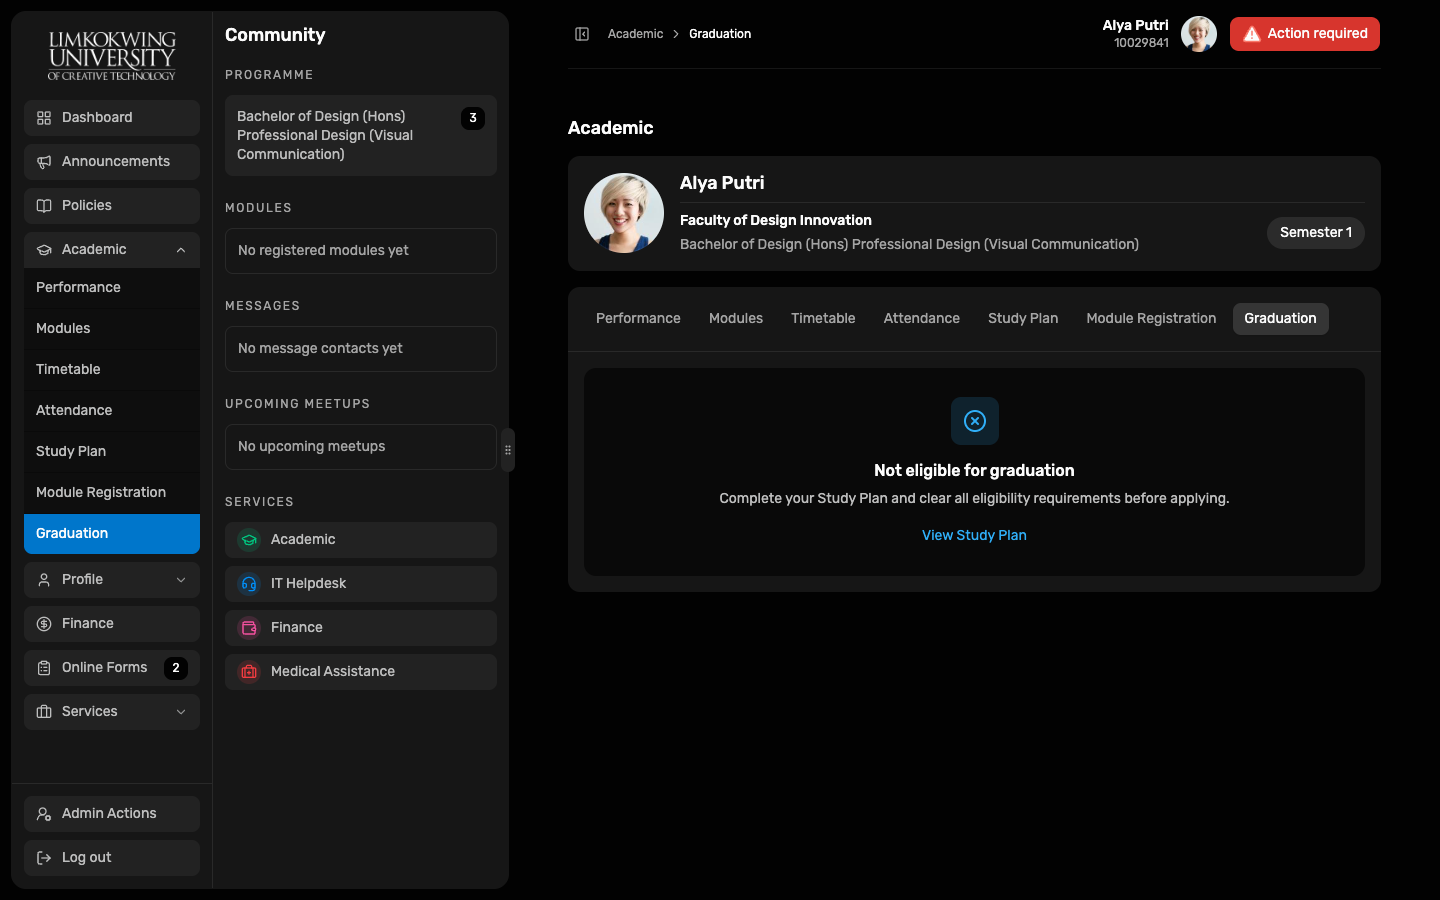
Sidebar Academic › Graduation or Open Graduation · /academic/graduation

If you are not yet eligible, the page explains what is missing. Once eligible, work through the steps:

  1. Clearance — Open Graduation Clearance and submit. Faculty, Finance and Library review it (Awaiting department review, Department clearance confirmed, Student action required), then Registry gives final approval. Choose Proceed to Step 2.
  2. Graduation fee — View Graduation Invoice and pay through Finance (bank-transfer proof or counter). When settled, Proceed to Step 3.
  3. Convocation (optional) — say whether you attend; attending needs a gown size (XS–XXL) and shows Under review until Registry confirms. Proceed to Step 4.
  4. Documents / student pass — track the Completion letter, Transcript and Scroll to collection. International students also track passport handover and pass cancellation.
  5. Complete — Congratulations!

Submitted forms cannot be edited — send corrections through the form’s messages. The sample fee is RM500 whether or not you attend. Download Transcript is not active yet.

Demo · progress resets on refresh
Graduation

5. Profile

Your personal record, admission evidence, resume, portfolio, documents and privacy information. All Profile pages share a summary card and tab row; active account issues appear as cards under the summary.

Personal

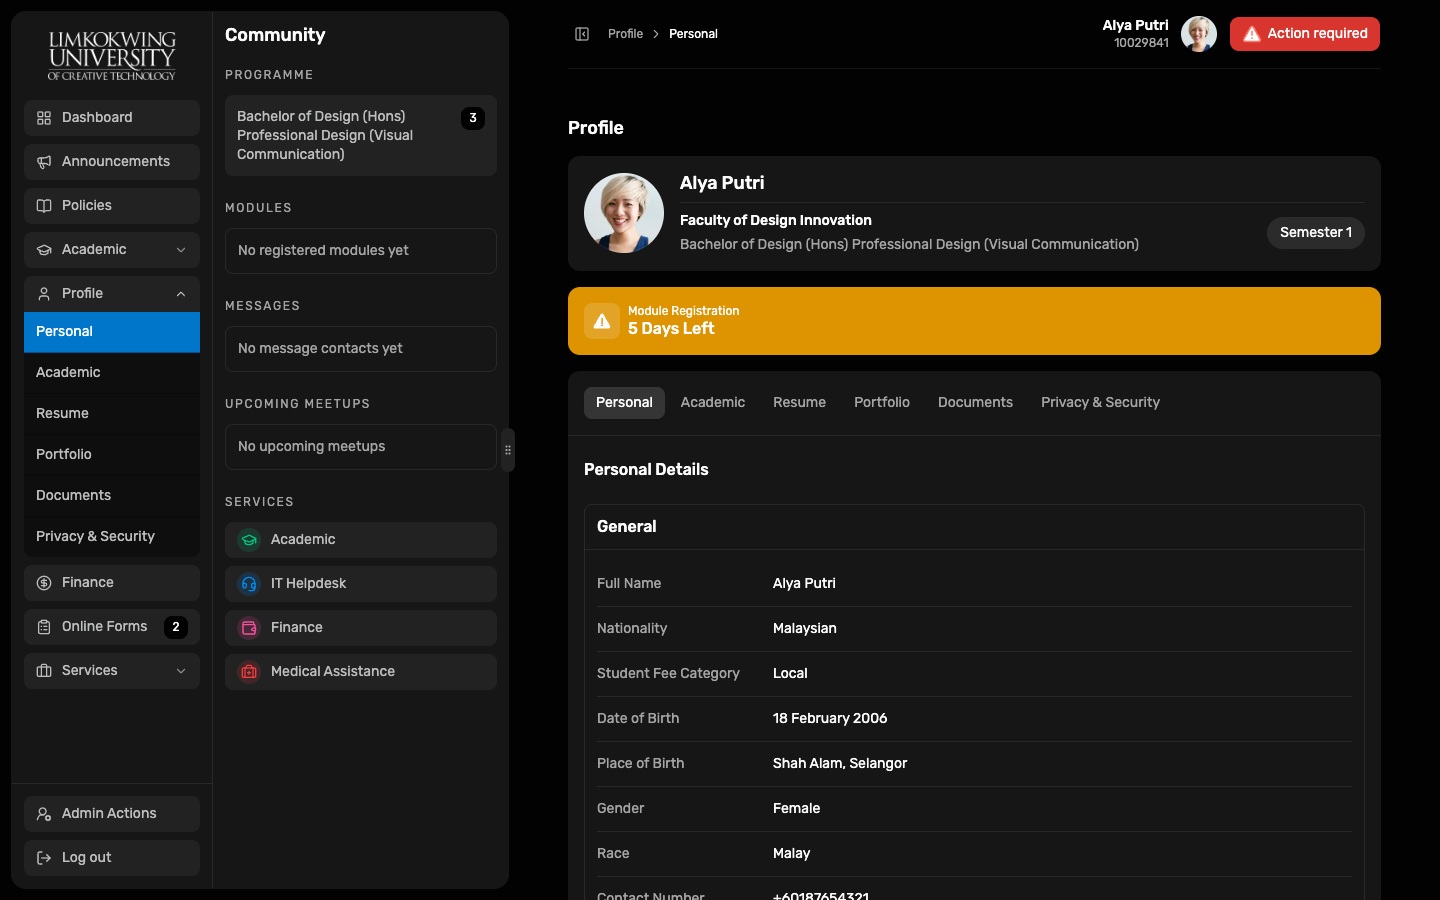
Sidebar Profile › Personal · /profile/personal-info

  1. Choose Edit.
  2. Change contact number, marital status, email, permanent or current address, and emergency contacts (Add another emergency contact or the trash icon).
  3. Choose Save Changes, or Cancel to discard.

Name, nationality, fee category, birth details, gender, race, ID number and passport details are locked — ask the campus to correct them. Keep at least one emergency contact. If saving fails you stay in edit mode with your changes kept.

Demo · changes reset on refresh
Profile Personal

Academic (profile)

Sidebar Profile › Academic · /profile/academic

Read-only record of the admission evidence the university holds: Academic Qualifications (newest first, labelled Qualification 1, 2 …) and English Proficiency (test, date, score, expiry). Missing values show “—”. Document names do not download yet. Your Resume education is separate and is not copied from here.

Demo · read-only

Resume

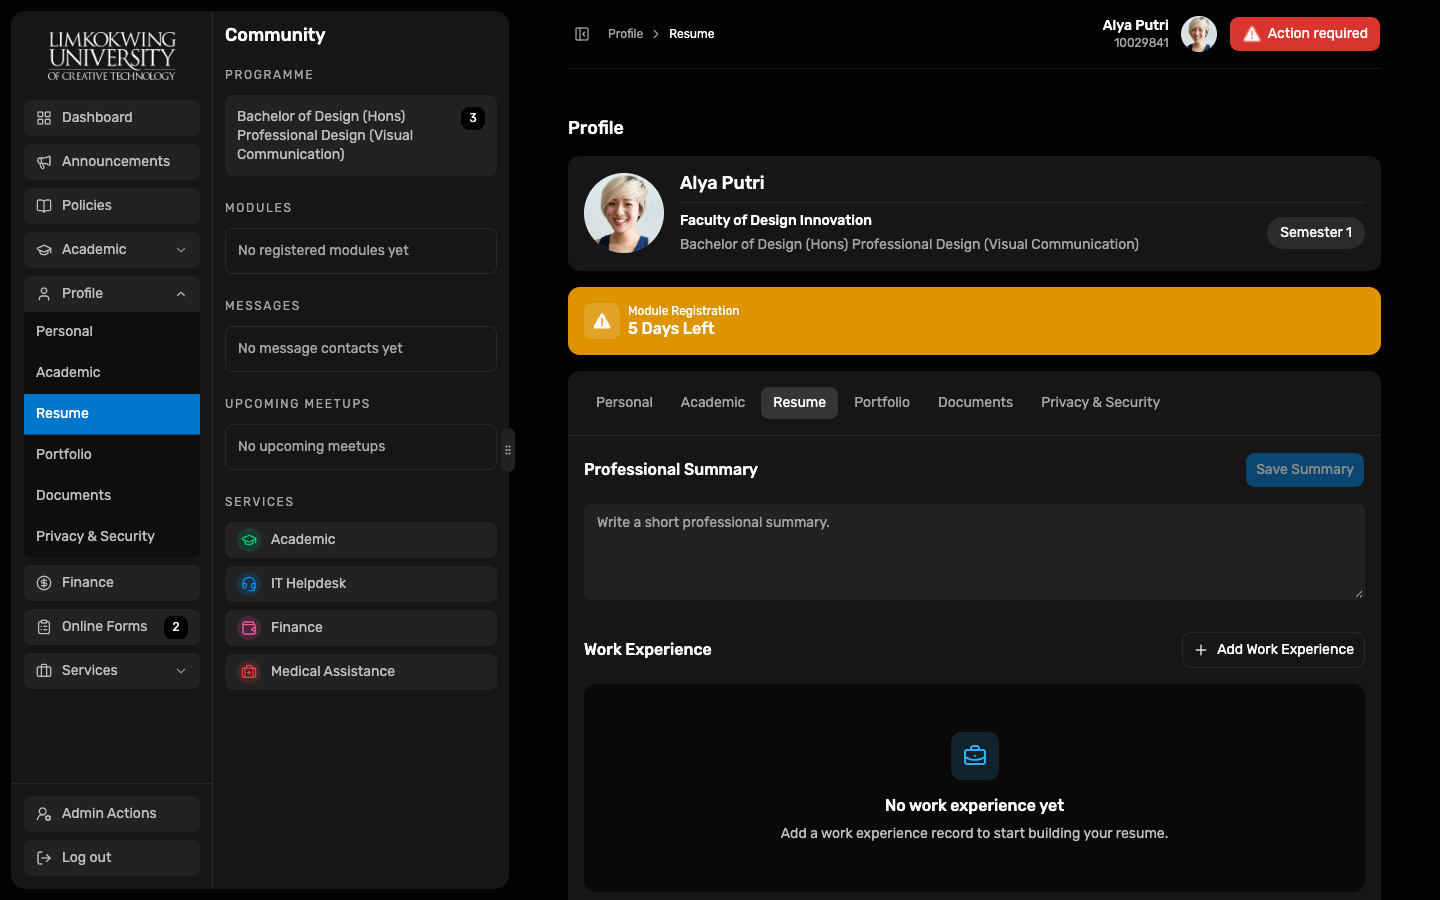
Sidebar Profile › Resume · /profile/resume

  1. Type your Professional Summary and choose Save Summary.
  2. Add items with Add Work Experience, Add Education, Add Skill or Add Recognition.
  3. Select a row to edit it; use the trash icon and Remove to delete.

Leave End Date blank for Present. Items sort automatically (current first, then newest). No PDF export or templates yet.

Demo · changes reset on refresh
Profile Resume

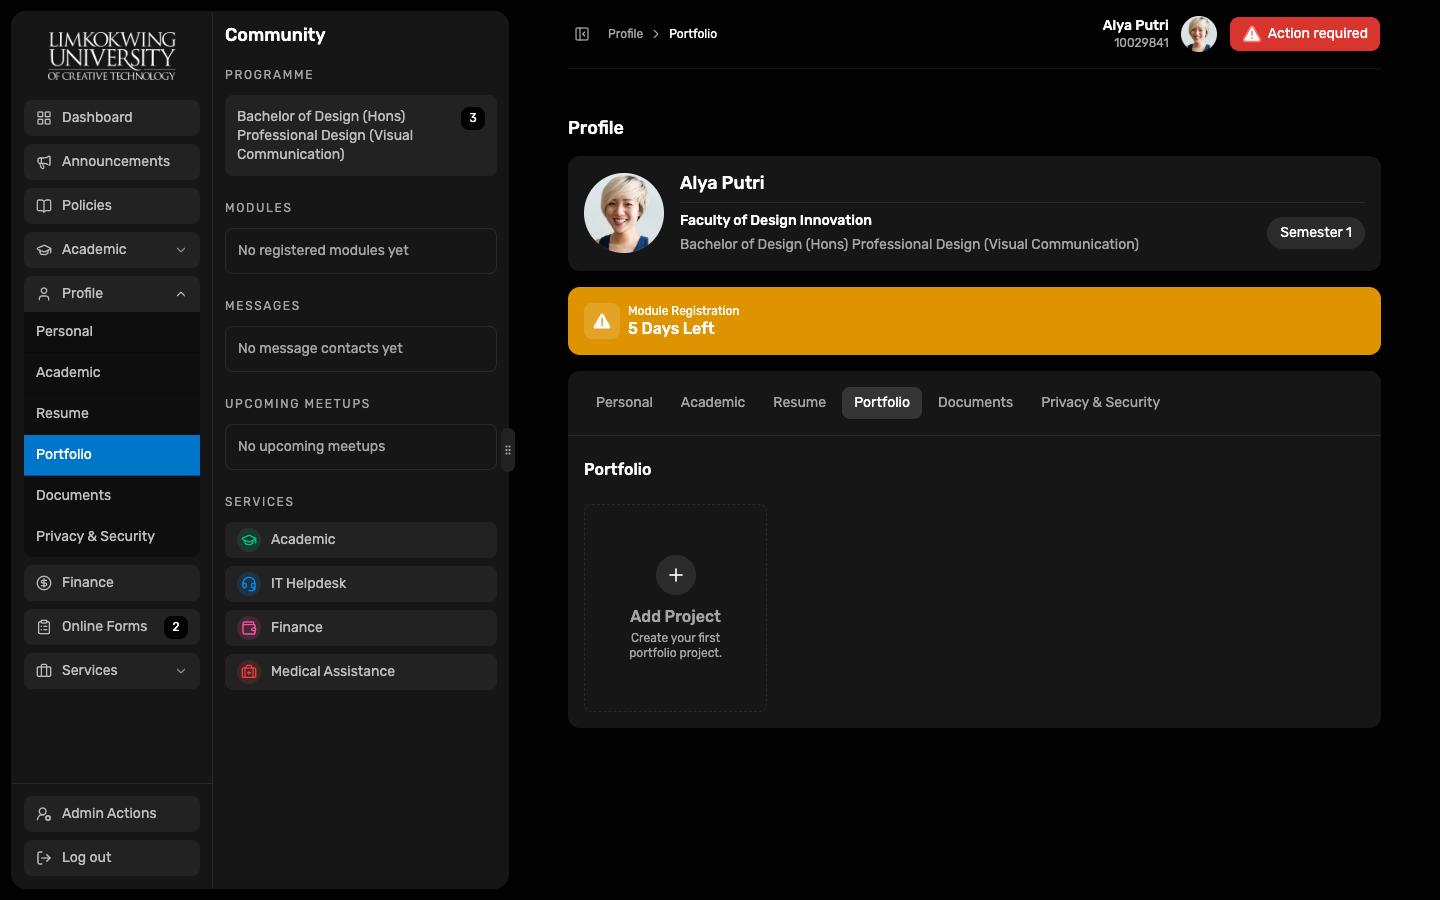
Portfolio

Sidebar Profile › Portfolio · /profile/portfolio

  1. Select the Add Project tile.
  2. Enter the project name and Date Created, a description and optional tools (comma-separated).
  3. Choose your artwork (required) and select Add Project.
  4. Open a card to view it; select the artwork for full size. Use the card menu to Edit or Delete.

Artwork: one JPEG, PNG, WebP, GIF or PDF, up to 25 MiB. Share is not active yet.

Demo · projects reset on refresh; nothing is uploaded
Profile Portfolio

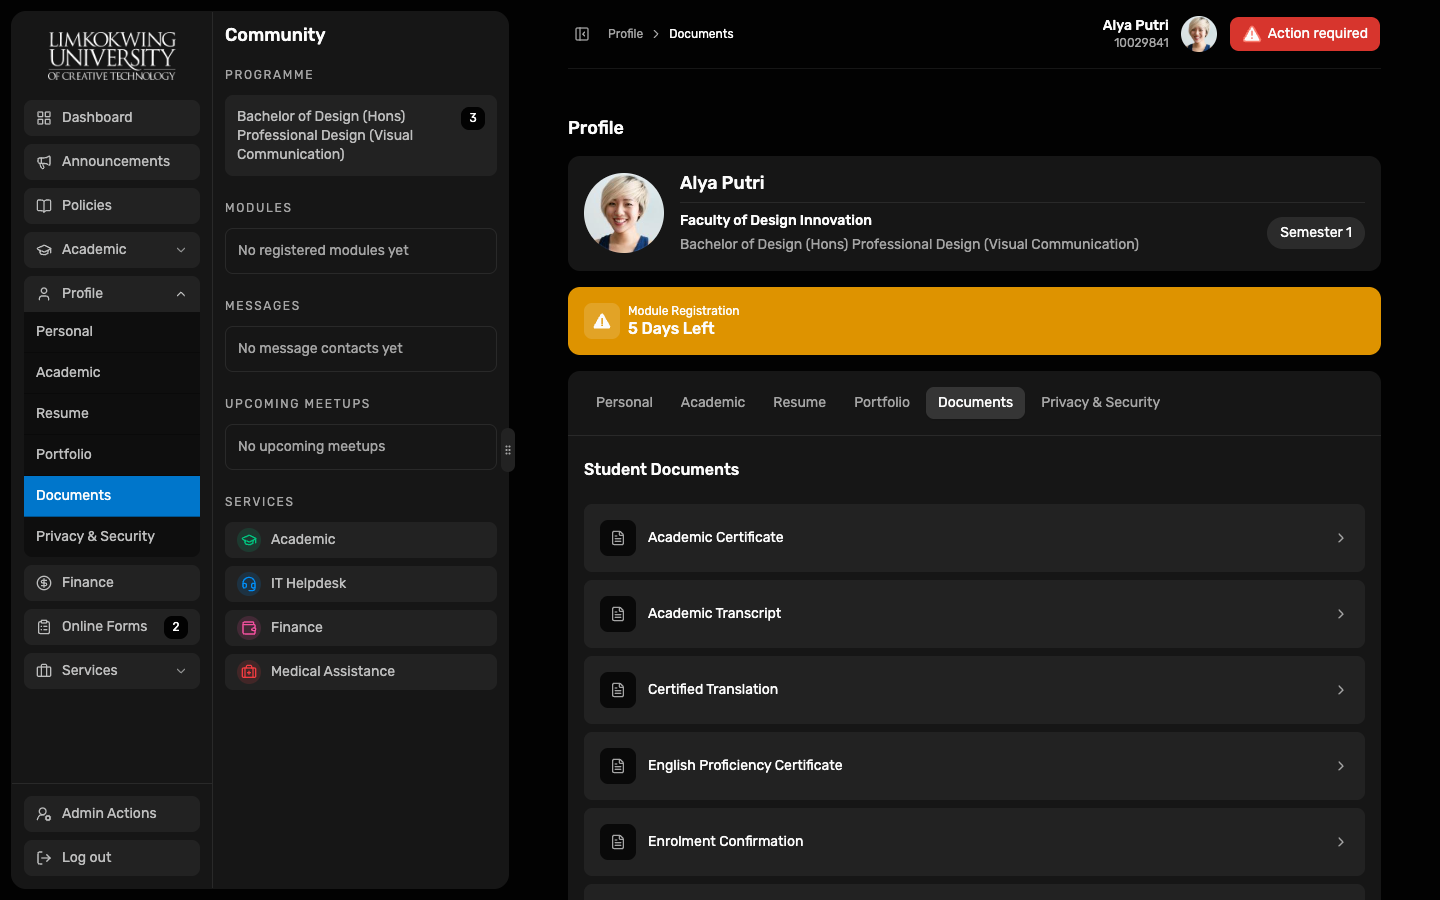
Documents

Sidebar Profile › Documents · /profile/documents

A list of the documents the university holds for you: passport photo and scan, qualification transcripts and certificates, English certificates, and letters such as Enrolment Confirmation. Opening or downloading a document is not active yet, and you cannot upload here — files you attach to an Online Form stay with that form. The Student Handbook is under Policies.

Demo · read-only
Profile Documents

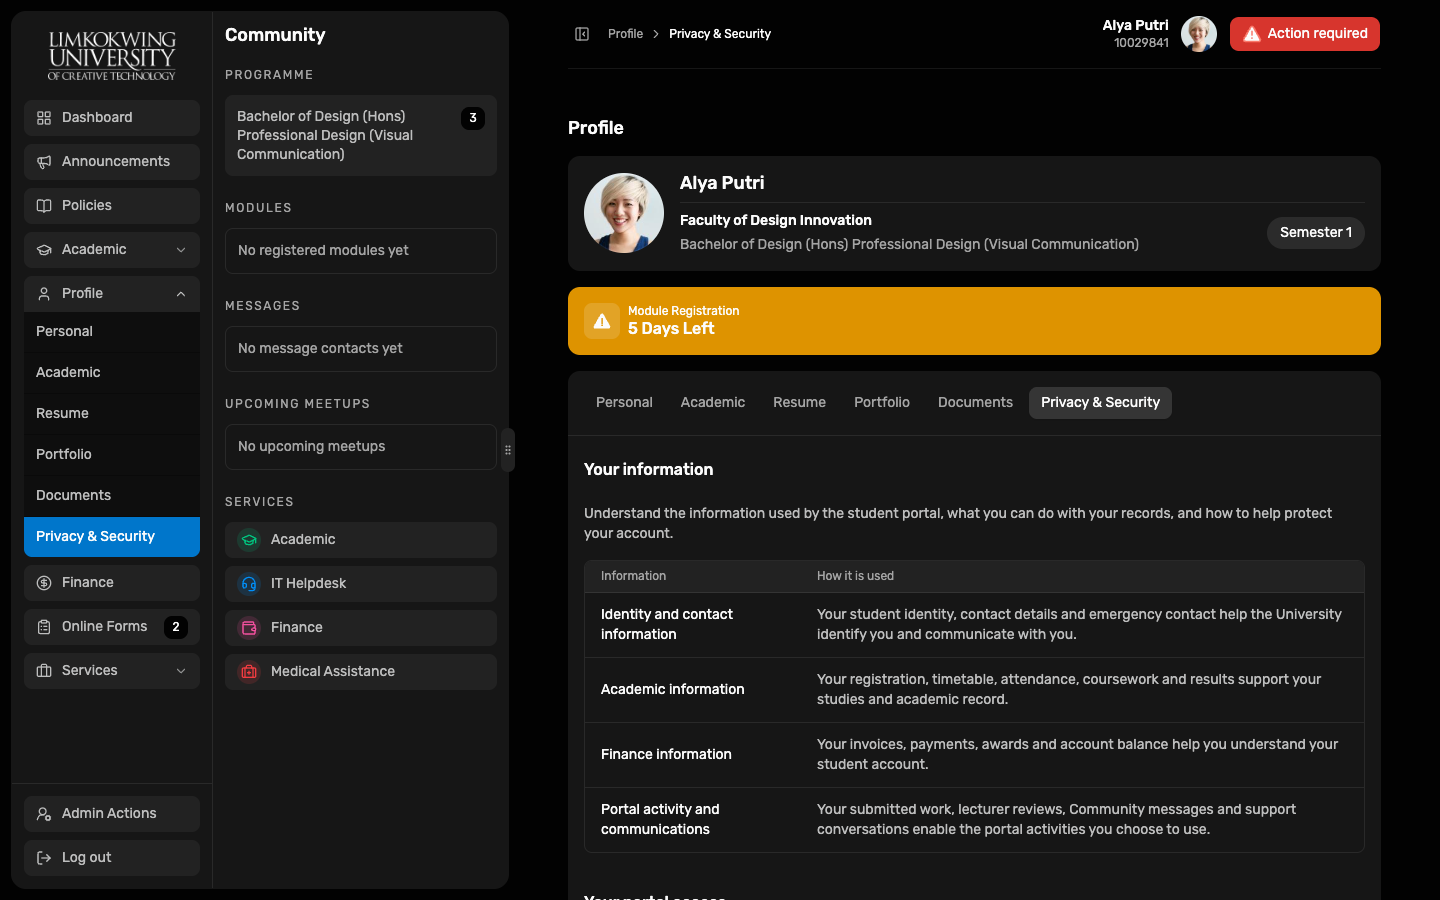
Privacy & Security

Sidebar Profile › Privacy & Security · /profile/privacy-security

  • Your information — what the portal uses and why.
  • Your portal access — what you can do in each area (explanation, not a setting).
  • Keeping your account secure — campus tips.
  • Privacy questions and requests — Open IT Helpdesk or Open Online Forms.

There are no settings to change here (no consent toggles or password change). Use IT Helpdesk for privacy questions.

Demo · read-only
Privacy and Security

6. Finance and Immigration

Pay fees and follow your Student Pass.

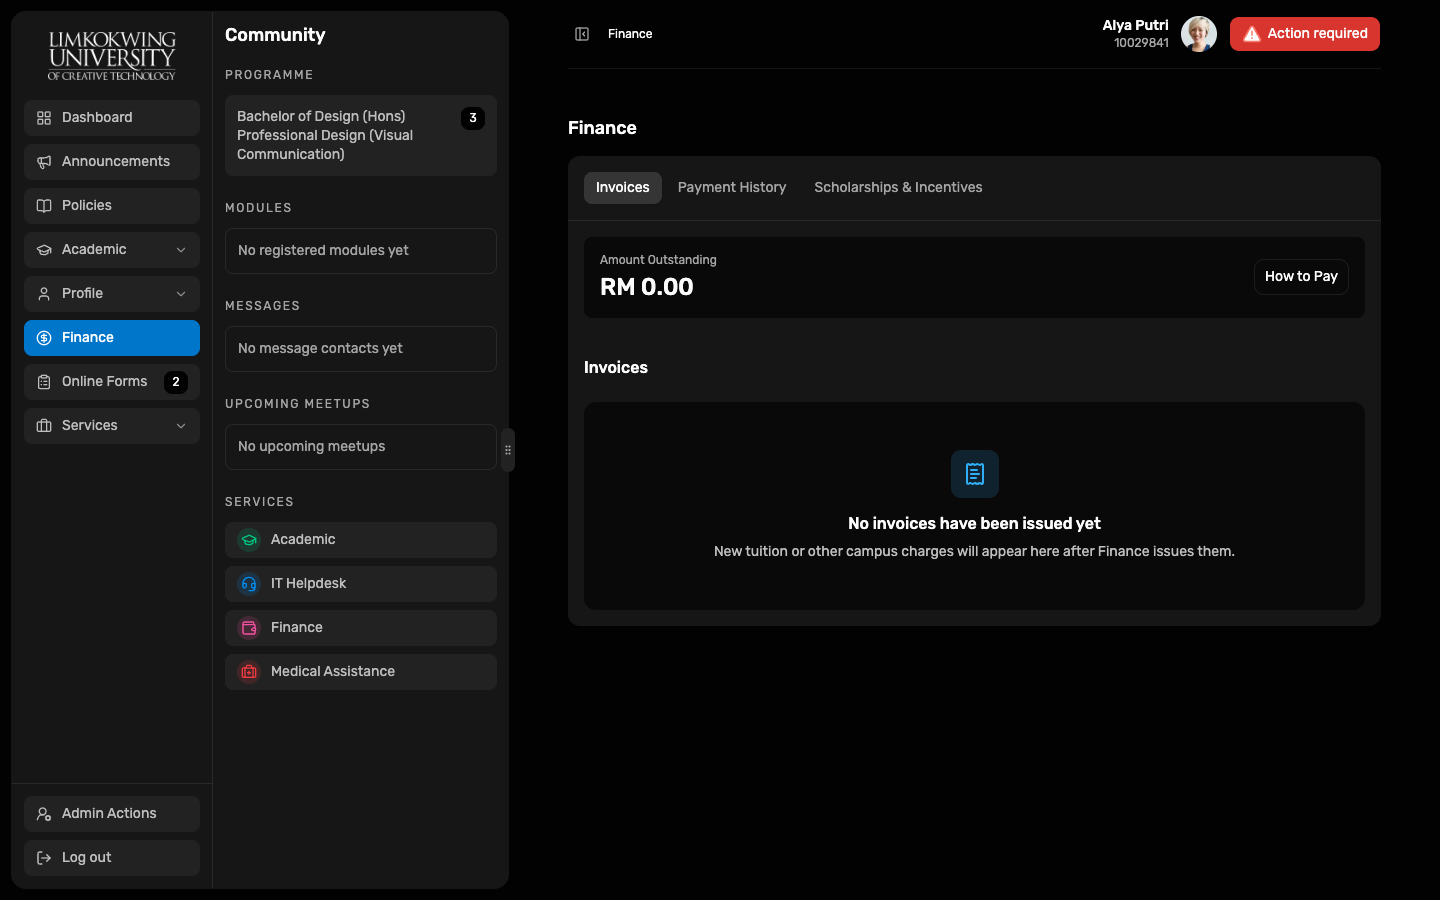
Finance

Sidebar Finance · /finance · tabs Invoices, Payment History, Scholarships & Incentives

Read your balance

The top card shows Amount Outstanding (or Account Credit). Unapplied Credit is money Finance has received but not yet applied to an invoice. Invoices show Unpaid, Partially Paid, Paid or Void.

Pay an invoice

  1. Choose How to Pay for counter hours, bank details and the payment reference format. Posting takes 3–5 working days.
  2. Pay at the campus counter or by bank transfer — there is no online card payment.

Upload bank-transfer proof

  1. Open the invoice and choose Submit Transfer Proof.
  2. Enter the amount, transfer date and bank reference, attach one file, then Submit Proof.
  3. To change it: Change Transfer Proof → Save Changes. To remove: Withdraw Transfer Proof → Withdraw Proof.

Amount above 0 and no more than the balance; date not in the future; one PDF, JPEG or PNG up to 10 MiB; one pending proof per invoice. A proof shows Pending verification and does not reduce your balance until Finance verifies it. Download Invoice is not active yet.

Demo · proofs reset on refresh; verification is simulated; bank details are fictional
Finance

Immigration (Student Pass)

Sidebar Immigration · /immigration · international students at Cyberjaya only

  1. On Student Pass, check your pass status (Valid, Expiring, Expired, Cancelled) and start a case: Start New Student Pass Application, Start Student Pass Renewal or Request Student Pass Cancellation.
  2. Follow the numbered steps on Applications. A new pass goes through: application and documents → review and fee (View Immigration Invoice) → EMGS processing and eVAL approval → medical screening (Open Medical Screening Form) → passport and endorsement.
  3. Use Proceed to Step N to move on and View Application Form to review what you sent.

One active case at a time. Sample fees: new pass RM2,650, renewal RM954, cancellation RM53 (no fee when triggered by graduation). Only full payment unlocks the next step. Submit a new application from outside Malaysia. If your pass has expired, contact the International Office.

Demo · nothing is sent to EMGS or Immigration
Immigration

7. Online Forms

Requests to the campus: clearance, Student Pass, appeals, accessibility and complaints.

Start, draft and submit a form

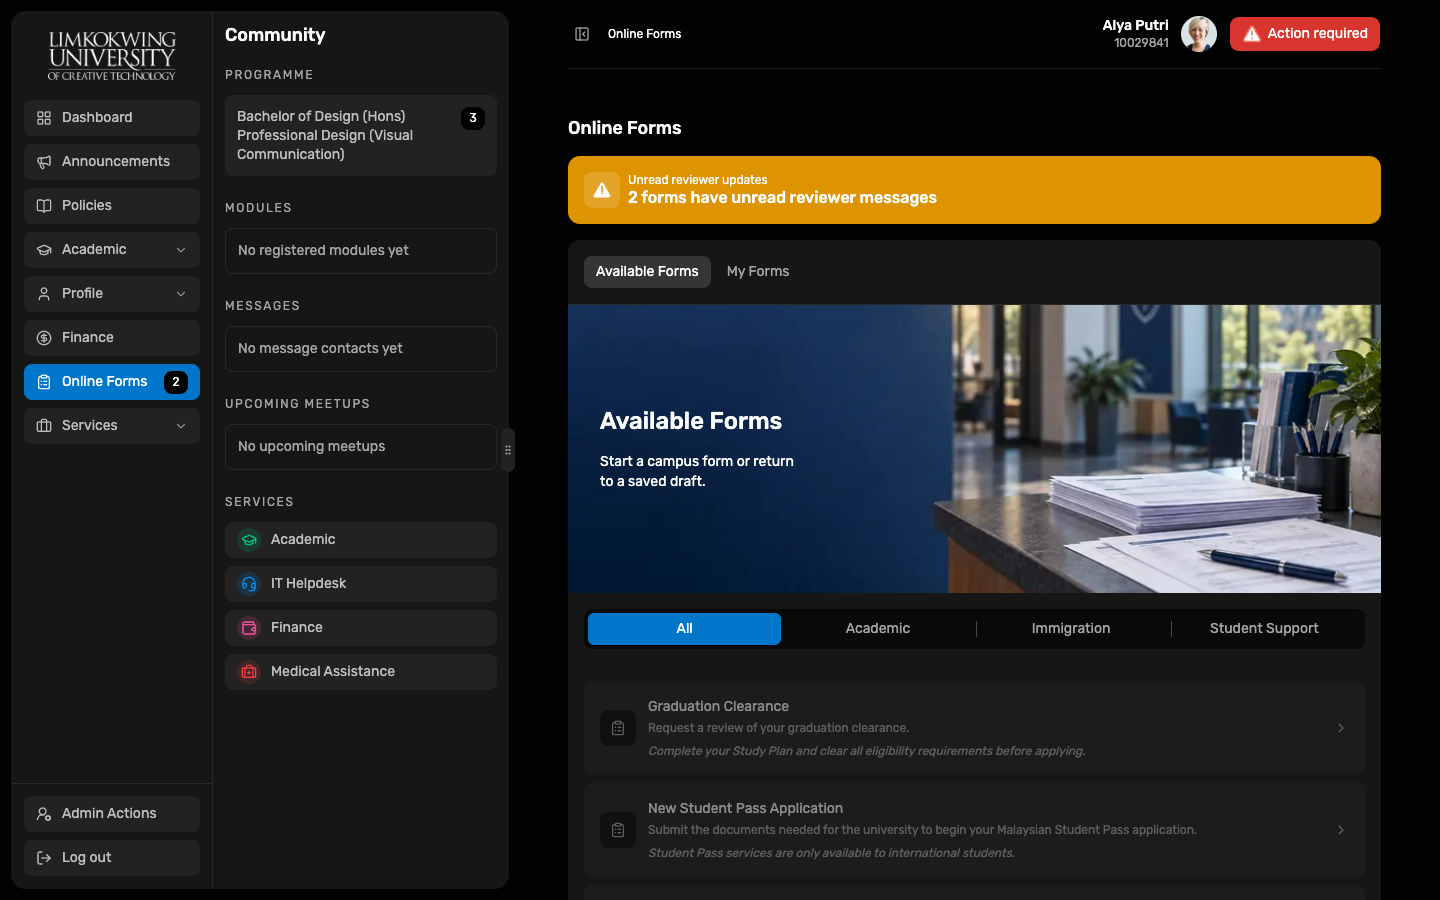
Sidebar Online Forms · /online-forms · tabs Available Forms and My Forms

  1. On Available Forms, filter by category and choose a form. Forms you are not eligible for stay visible with the reason.
  2. Read Prefilled Details and Before you start, then choose Start (or Resume).
  3. Fill in the fields and attach files where asked. Your draft saves as you go; Save and close keeps it for later.
  4. Submit and confirm. You get a reference number and your answers are locked.
  5. Follow the case in My Forms: Draft, Submitted, Under review, Completed, Rejected or Withdrawn.

Messages and withdrawing

  • Use the case chat to answer reviewers or add evidence. Unread replies show on the list, in the Messages column and as the sidebar badge.
  • You can withdraw an open case after confirming. Finished cases are read-only and cannot be deleted.

Forms: Graduation Clearance, Convocation Registration, New Student Pass Application, Student Pass Renewal, Student Pass Cancellation, Academic Appeal, Accessibility Support, Student Complaint. Medical Screening Result opens only from Immigration after eVAL approval.

Attachments: up to 5 files per field, 25 MiB each, 75 MiB total (passport, photo and medical fields take one file; medical results must be PDF, JPEG or PNG).

Demo · reviewers do not reply; drafts and submissions reset on refresh
Online Forms

8. Services and getting help

Campus service information, chats and IT Helpdesk.

Services

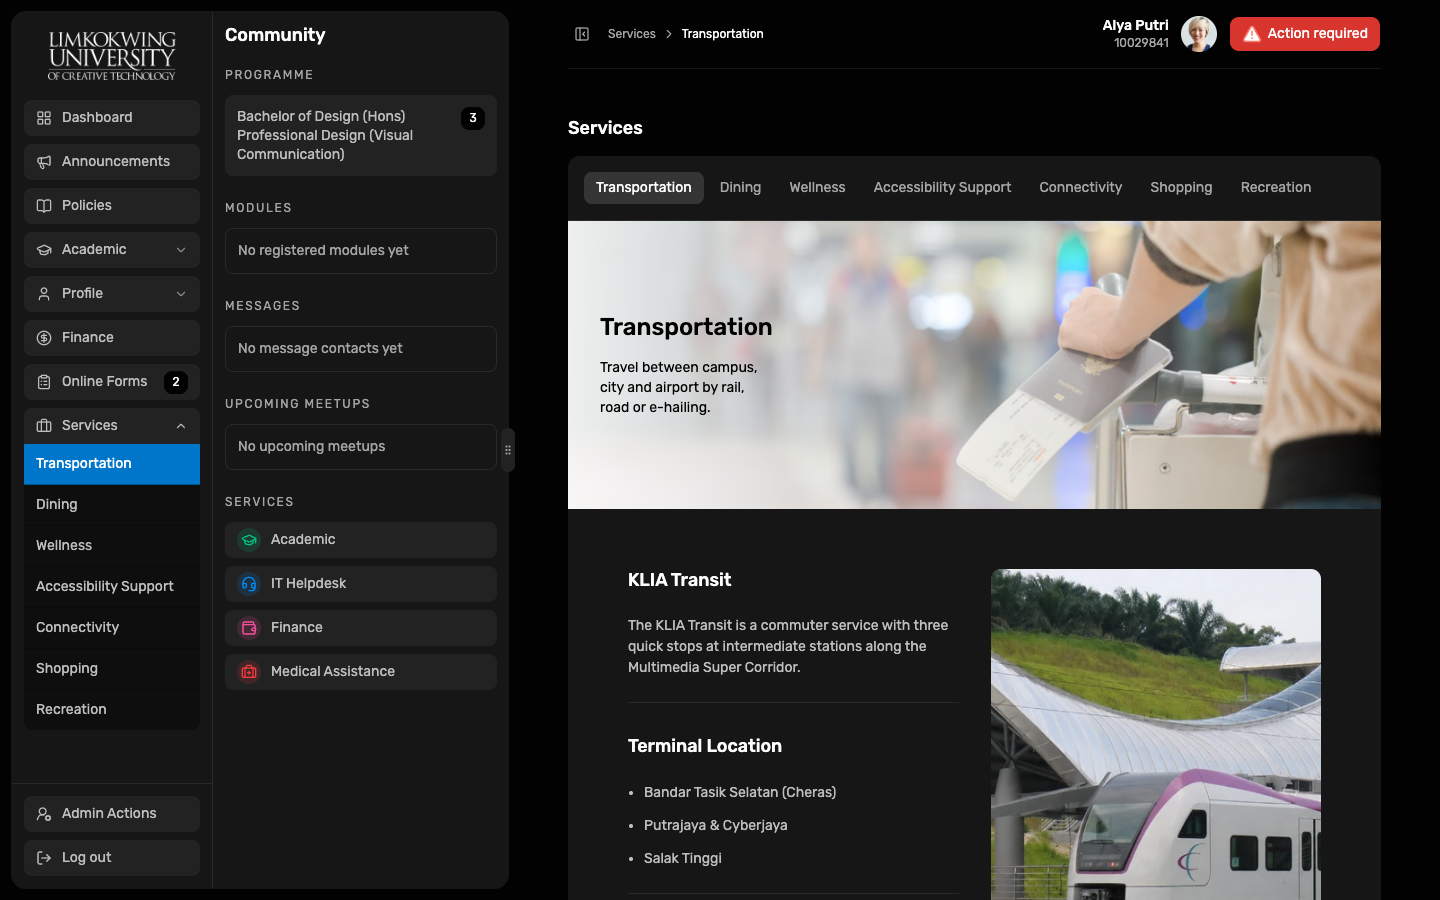
Sidebar Services · /services

Information pages for Transportation, Dining, Wellness, Accessibility Support, Connectivity, Shopping and Recreation, with photos and tables. There are no bookings or payments. Accessibility Support links to the Open Accessibility Support Form for formal requests.

Demo · read-only
Services

Chats and IT Helpdesk

  1. Open Community (chat-bubble icon) and choose a Programme, Module, Message or Service row.
  2. Type a message, attach files if needed, and send. One-to-one and service chats show Sent or Read.
  3. Select one of your own messages to delete it.
  4. For technical problems, open Services › IT Helpdesk in Community (or Open IT Helpdesk on Privacy & Security).

Up to 5 files per message, 25 MB each, 75 MB total. Only safe image types preview inline. If sending fails, your draft is kept. IT Helpdesk does not create a ticket number yet, and View profile is not active.

Demo · messages reset on refresh

9. Troubleshooting and limits

Answers to common questions in the Demo.

What you noticeWhy, and what to do
My changes disappeared after a refresh.Expected in the Demo: profile edits, forms, registrations, proofs and messages last only for the current session.
The page says Loading portal content for a few seconds.The Demo server wakes up on the first request. Wait a moment; later pages load quickly.
Log out does nothing.Not active in the Demo. Close the browser tab.
I can’t see Immigration.It only appears for international students. The hosted Demo student is Local.
I can’t confirm Module Registration.Check the credit total (12–20), timetable clashes, required repeats and prerequisites. International students need an eVAL-approved Student Pass application.
My payment proof didn’t reduce my balance.Proofs stay Pending verification until Finance verifies them.
A document, policy or download doesn’t open.Those links are not active in this phase.
Something looks wrong.Use Community › IT Helpdesk in the portal, or tell the Raisd working group.
Live delivery connects the portal to the campus CMS through the Portal API (CAP-53). Until then every screen above is Demo behaviour. Contract and endpoints: Swagger UI.